Virtual Band at Build 2016 Hackathon

I attended the after conference Hackathon at Microsoft Build 2016 with a couple of buddies (Alan and Matt) from work. We had a ton of fun and created a pretty cool app that we named Virtual Band.
Below is a video we created at the Hackathon that documents our application (sorry for the poor quality as it was recorded with my cell phone).
Inspiration
I got a couple of Microsoft Bands for Christmas. Both a Band 1 and a Band 2. As such I’ve been spending a lot of time running and walking on our treadmill and I am always looking for ways to entertain myself. We were inspired by this to create the Virtual Band. An app that allows you to run through a landscape of your choice using just your treadmill, a tablet and your Microsoft Band.
What it does
The app allows you to put your tablet or phone on your treadmill and run through a virtual world either by yourself or with your friends using your Microsoft Band (works with Band 1 and Band 2) to move you forward at the speed you are really running or walking. We also collect Heart Rate, Speed, and Calorie data from the Band and display it in a HUD in the application. This makes running more enjoyable and gives you a much more enjoyable treadmill experience.
How we built it
Since this was for the Microsoft Build Conference we built a Universal Windows Platform (UWP) application. This allows us to deploy to PC, Tablet and Phone.
We used:
- Unity3d to create the virtual world.
- Tons of free Assets from the Unity Asset Store
- Microsoft Band API’s to gather telemetry from the Microsoft Band
- SignalR and Azure websites to allow support for multi-player
Challenges we ran into
Source Control
We used TFS as our source control during the hackathon. Initially we had trouble getting all the right files from our Unity project checked in.
Once we got all the right files checked in we were up and going, but source control continued to be a problem throughout the project since we could
not manage files directly in Unity. Having an embedded source control system would help immensely in this situation.
Enable Visible Meta Files
You need to enable “Visible Meta Files” in Unity. This makes Unity compatible with external source control systems. You do this by going to Edit->Project Settings->Editor. Here is a link that talks about this:
Enable Unity C# Project in Unity Build Settings
In the build settings in Unity you need to make sure to check the box for “Unity C# Projects”. This allows you to debug your c# scripts in Visual studio when running your output project. This link discuss why you should do this:
Outputting the Windows Store App from Unity
In your Unity Build settings you can choose which platform you want to target. In our case we choose a Windows 10 UWP application.
When you build your project for the first time it generates all the files that you need for your UWP application.
Each subsequent build in Unity only re-generates the Unity specific files and code.
This is really important to understand, because that means you can make changes to the .xaml and .cs files in the Windows 10 part of the app and retain these changes between builds.
Files You Don’t Check In
- You should not check-in anything in the \Asset\Library\ folder
- If you aren’t making any changes to your resulting output project then you don’t need to check that folder in either, since you can just regenerate it.
- However in our case we did need to make changes to that part of the project, so had to check it in. In this case you should not check in anything from your “bin” or “obj” folders. We ended up checking everything else in (although we might have been overzealous here).
Building the UWP application
When you open up the UWP solution that gets generated, you should see three projects:
- Assembly-CSharp (Universal Windows)
- Assembly-CSharp-firstpass (Universal Windows)
- [Your app name] (Universal Windows)
The last project named with your project name is the actual UWP application and is what you build and deploy on your machine. However, we seemed to get build errors if we did not manually build the other two projects first. So if you are getting errors, make sure you manually build those other two projects before you run your UWP application.
Band API
The Band API was easy to use overall. However one thing we quickly discovered was that the band does not report distance and speed as quickly as we would have liked. The band reports this data 5 to 10 seconds behind. So when you first launch the application and start running there is a several second delay before you start moving through the world.
We did attempt to use the accelerator to detect movement early before distance and speed is reported, but ran out of time before we could implement this feature.
The Sensor Data we are consuming is:
- Distance
- Speed
- Heart Rate
- Calories
Overall using the band API’s was pretty easy. For more information on using the Microsoft Band API see the links below:
SignalR and Azure
Using Microsoft Azure free websites we setup a SignalR web app. This allowed us to very simply implement multiplayer support in our application.
Every second we send a message up to the website reporting the player’s current position and velocity. This data is then sent by SignalR down to
any other connected clients.
Below are some links to some tutorials we followed to help implement this…
- http://www.asp.net/signalr/overview/deployment/using-signalr-with-azure-web-sites
- http://dotnetbyexample.blogspot.com/2015/05/using-windows-10-uwp-app-and-signalr-on.html
Unity and AppCallback
We found out very quickly that we could not implement the Band API directly in Unity. We also found out that the SignalR library could not be used in Unity directly either (at least not without purchasing a third party plug-in from the asset store)
Fortunately we were able to get around this by using Unity’s AppCallback class. This class is available from the Windows 10 app code, and allows you to send messages to and from Unity.
Below are some links documenting how this is done.
- http://docs.unity3d.com/Manual/windowsstore-appcallbacks.html
- http://docs.unity3d.com/Manual/windowsstore-examples.html
By using the AppCallback class we where able to use the Band Libraries and SignalR libraries in our Windows 10 application and send messages to and from the Unity player. However, this meant we had to make changes to the project that Unity generates when it builds. It turned out that this is not a problem because Unity doesn’t change the Windows 10 .xaml or .cs files after it spits them out for the first time. All subsequent builds just update the Unity portion of the project.
Unity Terrain Tips and Tricks
I had a bunch of problems trying to get our Unity Terrain to work at a good frame rate. In the first version of the terrain I scaled back many of the Camera and Terrain settings as well as the quality settings to try and get things to run at a smooth frame rate. These changes worked, but made our game look fairly ugly and old. We also had problems with the way steep slopes look due to the way the default terrain shader works.
After doing some research (see links below). I was able to optimize our textures and implement some post processing effects that make our game look really great. This is really an entire topic of it’s own, so I will just post the links I used to research this. But another post would be needed to do it justice.
Links:
- http://forum.unity3d.com/threads/the-secret-to-great-terrain-on-mobile.305899/
- https://www.assetstore.unity3d.com/en/#!/content/3224
- https://www.assetstore.unity3d.com/en/#!/content/44225
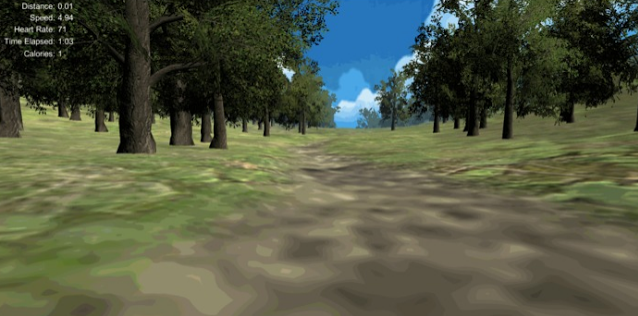
Before Optimization and Image Effects (running at 40 fps):

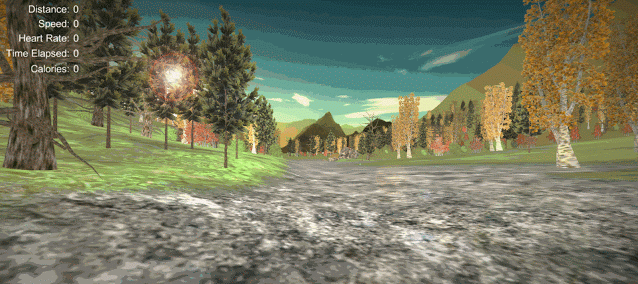
After Optimizations and Image Effects (running at 60+ fps)

What’s next for Virtual Band
We think the app turned out really good for the time that we had. As with any hackathon much of our code needs to be re-written to be more maintainable (so if you look at our code repository, just keep in mind we wrote this in less than 24 hours with only a couple of hours of sleep)
We would like to implement voice recognition to be able to let the user decide which routes to take in a particular level. We also would like to add additional levels - like beaches, cities or parks. Finally we would like to add in animated characters to represent friends who are playing with you.
We had a great time at the Hackathon - thanks Microsoft Build!
